Plaster or cement rendering is covering a surface with cement render or plaster complete on an inward or outside wall. Plaster is for protection and decoration of each building. Part of outer plaster isn’t just to secure the covering structures of the building against the effects of the outside condition such as rain, wind, and daylight, but also to give warm and sound assurance of inside areas.
Rendering Fundamentals:
Concrete based render on both inward and outer walls perform various functionalities. These incorporate better waterproofing, enhanced fire rating and an enhanced appearance using shaded or finished renders.
To get the best outcomes, it is necessary that the blend is suited to the foundation surface. It is legitimately connected to the right thickness in the fitting number of coats and that curing is considered.
Setting Up The Surface To Be Rendered:
Before you begin, you have to guarantee that the surface you are rendering is free from dust, dirt, grease, oil, paint, silicone or friable material. Smooth thick surfaces with low ingestion rates like concrete or metal window casings should be developed with a “dash coat” preceding utilization of the render.
A dash coat is just an exceptionally solid blend of cement and water which is flicked over the wall or metal window frames, making a surface for the render to hold to. Allow the dash coat to dry for no less than 24 hours before you begin to apply the render.
Exceptionally absorbent surfaces like sandstone will ordinarily require splashing down to prevent loss of water from the naturally connected render.
Render Blending
- Most importantly, you have to settle on the category of render finish that you want and prefer.
- When blending renders by hand, measure the amounts thoroughly utilizing a similar check vessel for all fixings.
- Renders should be blended on a hard level surface (solid piece) or board, in a concrete blender or wheelbarrow.
- Stir up enough render that can be spent in 30 – 40 minutes. If oxides are to be included, at that point, you should follow the manufacturer’s guidelines for it.
- Merge all the dry materials until the point that the color is uniform. Include just little amounts of water at once while blending the render. The render should be soft and should adhere to the float when you turn it up-side-down. If the render is excessively wet, don’t utilize it – dispose of it and start again.

Applying The Render:
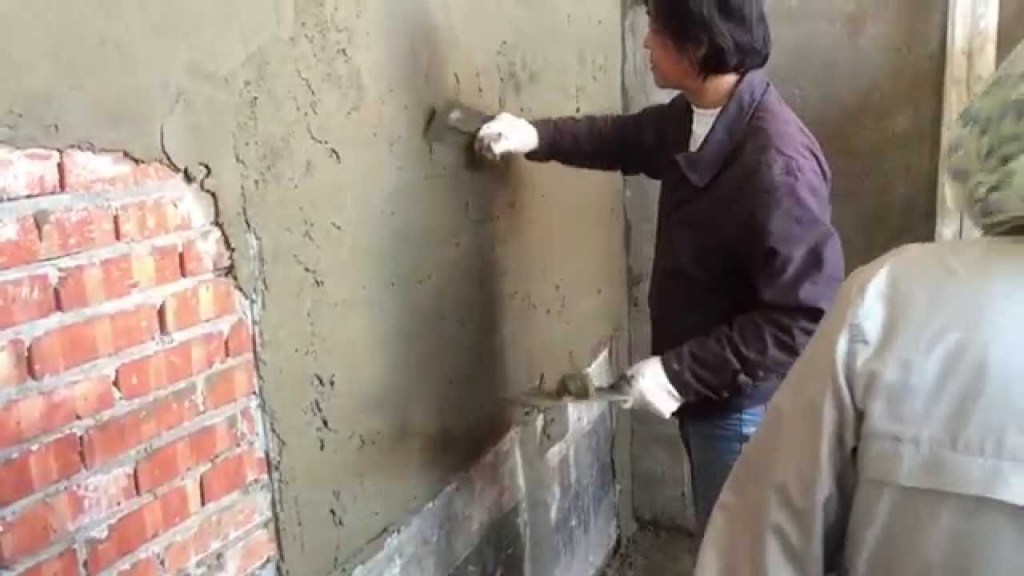
For the purpose of guiding thickness, you can nail wooden boards of the right thickness vertically to the wall which likewise gives you a spotless edge for your work. Utilizing your steel float, begin driving the main layer of render on to the wall.
Continue applying the render until the point that you have achieved the coveted thickness. Once the thickness has been achieved, utilize a straight edge, for example, a metal leveler and screed off the render utilizing a sawing movement. Tenderly trowel smooth with a steel float.
If you are applying more than one coat, you should give each coat a chance to dry for at least 3 to 7 days. You will then need to scour each coat with a sharp object to give a decent surface to the second layer of render to stick to.
Completing Render:
Various finalized finishing effects can be attained utilizing diverse completing systems on the last coat.
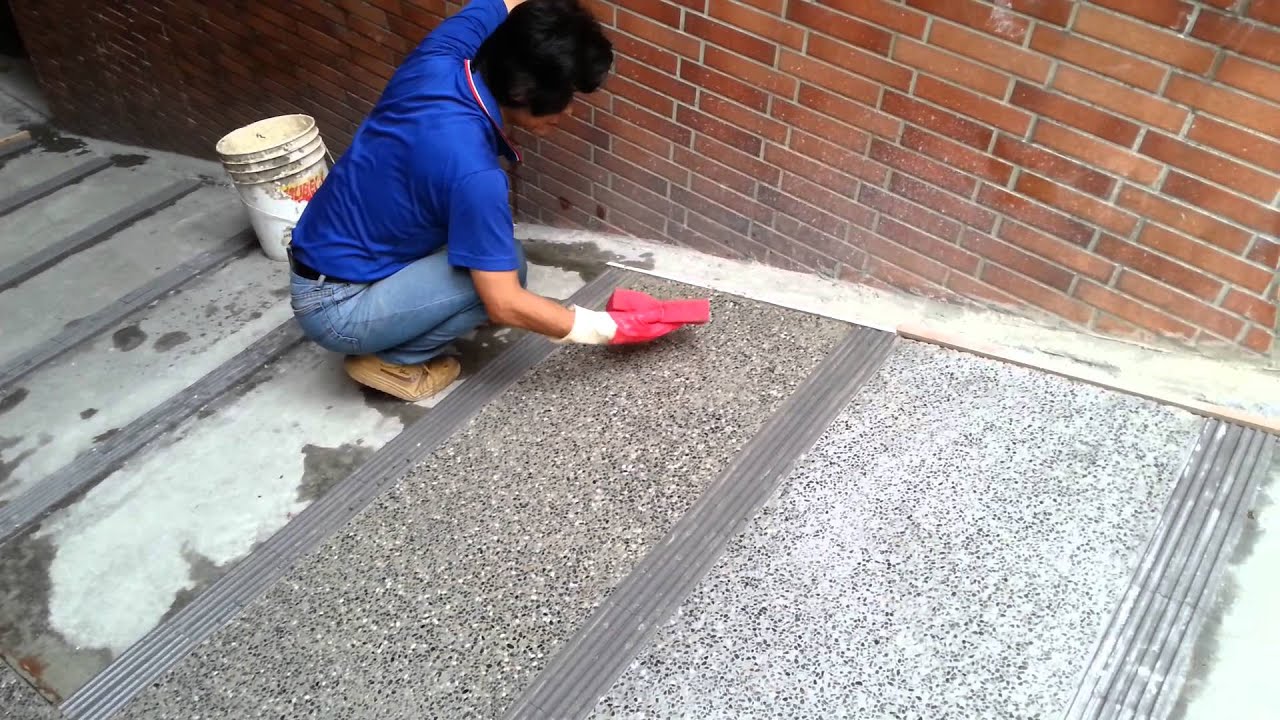
- Trowel Finish – This is done by skimming the last coat utilizing a wooden float to deliver a smooth thick surface.
- Patterned / Bagged Finish – This is done by rubbing a clammy hessian ball into the surface which produces designs according to the style of rubbing.
- Sponge / Wipe Finish – Sponging or Mopping the solidified surface with a clammy wipe attains a wipe finished wrap up.
- Roughcast Finish – Throwing and flicking the last coat onto the surface attains roughcast fishing, no re-touching is done.
- Finished Finish – Textured finish can be attained by a coarser aggregate being added to the blend for the last coat.

Steps To Follow While Doing House concrete / cement rendering
Rendering a wall of brick with concrete isn’t a simple task. It is an old procedure which has demonstrated its proficiency and utility throughout the years. Thus, despite the fact that it may look like a complex venture, experts suggest the use of cement rendering strategy, if you need to apply a solid complete on your brick or square walls.
From the starting point, it is necessary to bring up that this technique is pertinently just for stonework walls, not for drywall. In order to set up the concrete render, you could utilize a pre-blended mortar (you just need to include sand and water), or you can do it the old way, by utilizing cement, lime, concrete, and water.
If you need to utilize the old style strategy, you need to blend one section cement, one section lime and six sections sharp sand. To get an appropriate render, you need to utilize a power blender and pour in the concrete, lime, sand, and water. You need to blend these mixes for at least five minutes, ensuring you get material with the consistency of pinnate margarine.
For wall rendering, you will need the following items:
Materials:
Fine sand and Concrete render.
Tools:
Eye protector, Safety gloves, measuring tape, L-square, Carpentry pencil, Spirit level, Edge trowel to spread the concrete render, Solid blender to blend the concrete render, wheelbarrow or construction buckets to transport the cement render.
Important Tip:
Ensure the columns are plumb and Utilize the correct concrete render blend.
Step By Step Instructions To Render A Wall
- Setting Up The Walls: Prior to a building cement rendering, the walls should be analyzed, with repairs made to basic imperfections and any development stabilized, otherwise the finish of render is probably going to fall flat. Any new finish can be good only according to the wall behind it.
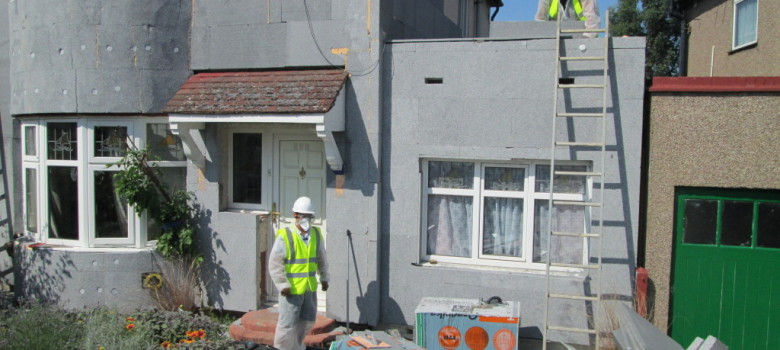
- Outside Details: Outside details, for example, bargeboards should be removed regularly, along with water and soil channels and other outer subtle elements, for example, alert boxes. Any vents should be expanded, and some of the time window ledges must be broadened as well. Metal stop and edge dots are then connected around the window and entryway openings and corners (or the terraced property edges) to give clean edges to the render. The render framework would then be able to be connected.
- Insulation: Where outside wall insulation is being connected before the render coat, this is normally in the form of inflexible sheets or sections. The kind of settling should be chosen according to the wall category — which is either mechanically settled or glued on the walls.
- Foundation Development: Render mesh of fabric is then connected over the insulation, added into the starting coat layer of render. This mesh works like a fortification against breaking. This is trailed by maybe a couple of thin layers of render, normally topcoat and primer.
- Building Render: Distinctive preventive frameworks are developed with various layers, utilizing different types of insulation, including extended polystyrene (EPS), mineral fiber (Rock Fiber) and phenolic froth (more costly however better performance). Diverse kinds of render are utilized with outer wall insulation frameworks, contingent upon the application and the coveted get done with, including polymer cement, silicone, and acrylic.
- Render Finalization: Thin coat render frameworks are intended to be naturally colored so that they needn’t bother with painting. In the selection of colors, distinctive finishes are available, with exceptionally smooth to the textured finish. If you have picked cement rendering that needs painting, ensure you pick a weatherproof paint for external use.
